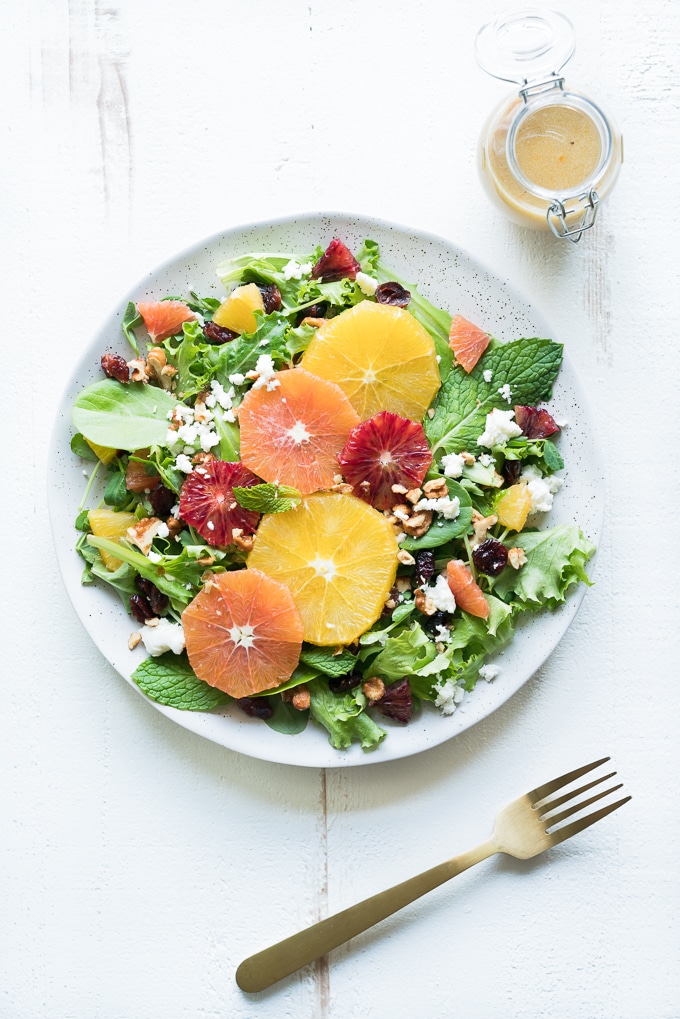
Servin' up a Super Citrus Salad today -- with a sweet and refreshing Orange Vinaigrette to boot!! Just place handfuls of tender baby greens into bowls, top with fresh slices of orange, tear up some fresh mint, and sprinkle on as many toppings as your pretty little heart desires. Toppings like creamy crumbled goat cheese + chewy, tart dried cranberries + crunchy chopped candied nuts. Drizzle on the dressing (which you make just by shaking up ingredients in a jar) and we are in business!
It is seriously THAT simple. This gluten free and vegetarian recipe is a total cinch to toss together.
This healthy salad uses three different kinds of citrus (navel + cara cara + blood oranges) to get a nice balance of flavors and colors.
But depending on seasonal availability or just your own personal preferences, you could use all of one variety too (adjusting the quantities as suggested in the recipe card notes so you have enough to fill your plate).
RELATED: Strawberry Pepita Salad + Maple Vinaigrette
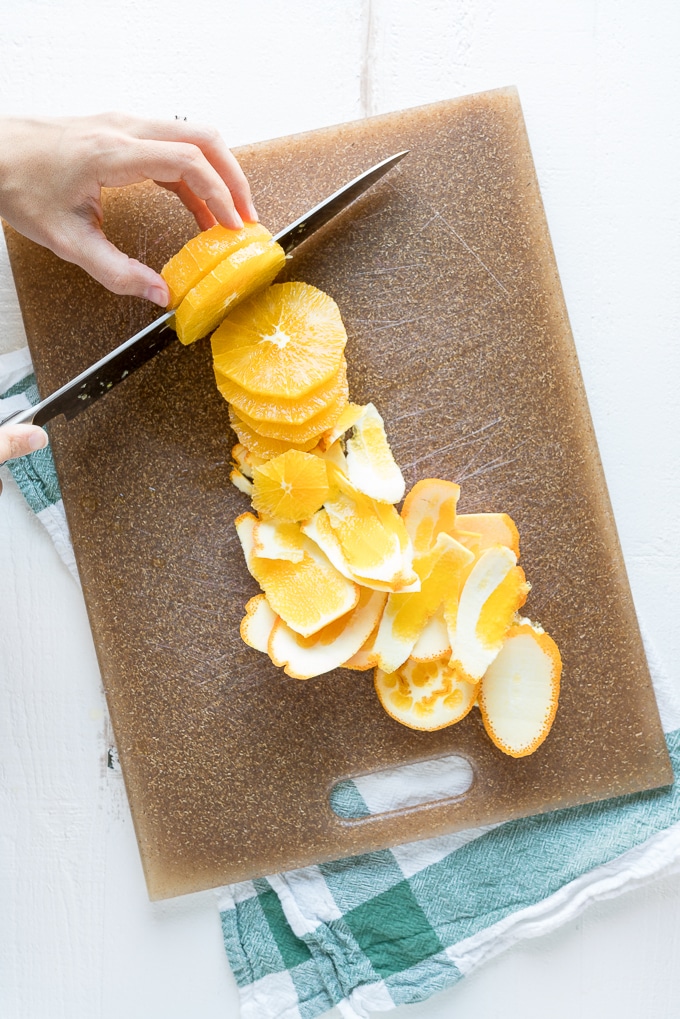
There are a few different ways to prepare the orange slices. You can peel them by hand and then slice them, or you can try a different (and I would argue easier) approach. My FAVORITE way to get clean orange slices involves slicing off the skin with a knife instead of removing it by hand.
I'm going to show you exactly how to do it, but first a few quick tips!
Placing a light layer of fabric between your cutting board and your counter top will prevent your cutting board from slipping around while you’re cutting.
So before you start cutting – simply place a dish rag or thin hand towel underneath your cutting board. It should anchor it in place and make for a safer prep surface.
Also, make sure to wash your oranges really really well. Even though you’re not going to be eating the skins, you will be making knife cuts that go through the skins and then into the fruit that you will be eating. So you want to make sure to give them a good rinse, followed (just as important) by a good pat dry. You don’t want a wet orange slipping around in your hands while you try to grip it, while also wielding a sharp knife. Trust me (and my many-a-time bandaid-clad fingers). Okay, now let's dive right in to...
How to *Peel* an Orange (using a knife)
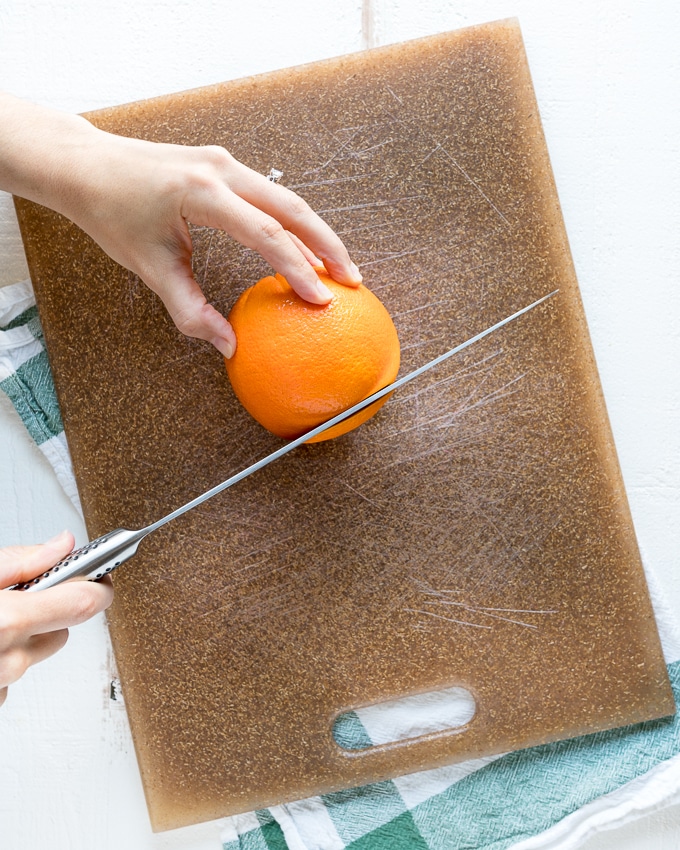
STEP 1: Slice off the end of the orange. This accomplishes two things – it cuts off the bottom section of skin AND it also helps you have a flatter surface for the orange to sit on the cutting board. Making it more stable, and an overall safer and less frustrating cutting experience. If the first time you cut it, you don’t see any of the inside showing – don’t worry. Just cut off another thin slice until you have revealed the inner flesh and you’re good to go.
STEP 2: Now that you’ve cut off one end of the orange, sit the orange flatside down on the cutting board. Then, gripping the top and opposite-from-the-knife-side of the orange, start making shallow slices down the side of the orange. You want to be very careful with your fingers to make sure they aren’t in the path of the blade, and try to follow the curvature of the orange as you slice down. Just like in step 1, if you’ve made a slice and it didn’t go through all the way – just slice, slice again until you have exposed the inner flesh. Having a very sharp knife helps make this easier. Go all the way around until you’ve sliced off everything from the sides.
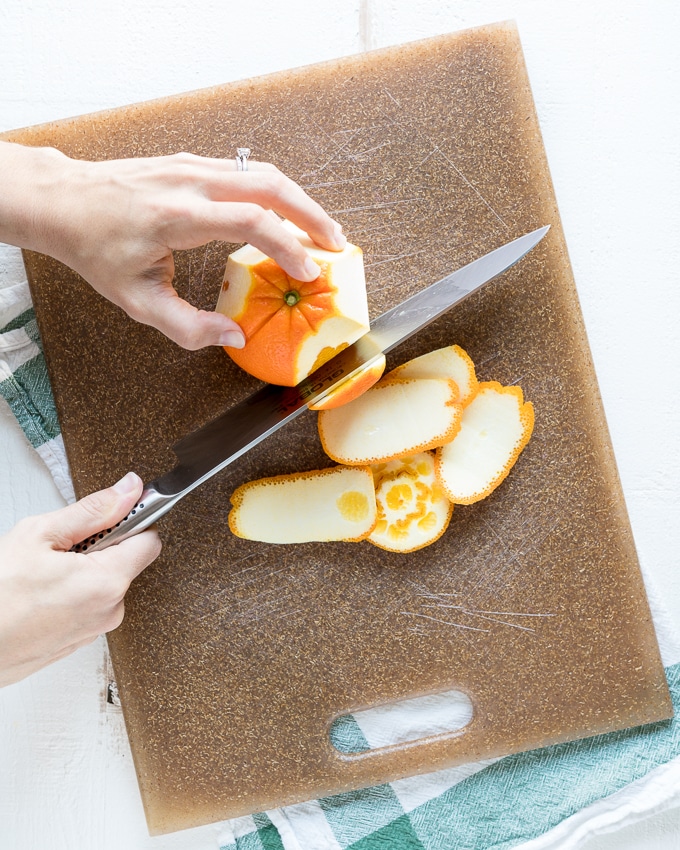
STEP 3: Clean it up. If you have any strips of white pith streaking down in between your cuts you can just go back and lightly saw them off. You can grip the top part of the orange, where there’s still skin on, and tilt it to one side to get the last bits of white off of the edges where the side of the fruit meets the bottom flat cut you made earlier.
STEP 4: Turn the orange back on its side and slice off the end that has the skin remaining. And just like that you should have a cleanly *peeled* orange that is ready to be sliced into rounds, half-moons, or quarter shapes.
This technique I just described is basically the beginning steps of how you would supreme an orange – which involves cutting citrus into segments that have had the skin, pith, and membranes removed. The only difference is that we are stopping once the peel has been removed, leaving the more skilled knife cuts and inner membranes where they are.
RELATED: Asian Pear Salad with Radishes
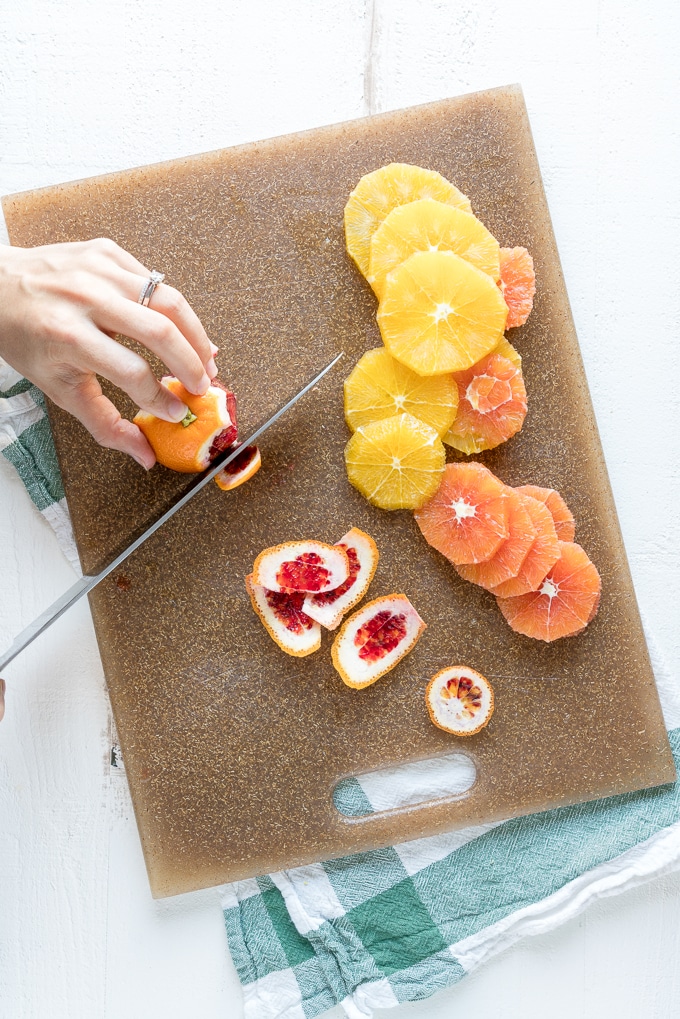
When you slice the oranges you should end up with neat little pinwheels (like you’ll see in the finished salad picture). A few slices at the very ends of both the navel orange and the cara cara orange will have a more mosaic look to them instead of the even pinwheel pattern. You can see an example on the cutting board in the picture above -- the pink slice sitting in the middle of the long row of finished slices. Instead of the white membrane at the center, there's just more circle shapes.
This mosaic pattern happens because there is more membrane happening in these sections. Did you know that navel oranges have a genetic mutation where a second orange starts growing inside of the first one? That’s why they have that funny little bulge at one end that kind of resembles a belly button. You’ve probably seen when you’ve peeled it that it looks like you got a mini (or what I call a bonus) orange inside of the bigger one. Cara cara oranges, the pinker hued ones you see in the salad, are also called pink or red navel oranges – so this happens with that variety too. The slices are just as edible, they just look a tiny bit different.
If you’re worried about presentation, then you can set these mosaic slices aside and freeze them to throw in smoothies later. They’re just as tasty and totally not worth letting go to waste.
RELATED: Roasted Butternut Squash Salad
A note about blood oranges – if you’ve never had them before, they might sound and look a little morbid. But they are actually super delicious and offer a nice (color and flavor) contrast to the other super sweet varieties. This darker hue will stain things pretty easily so be sure to avoid wearing your fave white tee while slicing into these and to wash your hands right after handling them (they can stain your skin and nails, kind of like turmeric does).
Before this year, I had just looked longingly at both blood oranges and cara cara oranges in the store. I felt like they weren't *necessary* foods, so I always skipped over them in the produce aisle. Vowing that "someday" I would give them a try. But life is short, and food is delicious. So I decided this year to be a tad more adventurous. To take a few more leaps in the kitchen. And just see where I land.
It's how I found out that I'm actually much better at baking than I thought I was. And that things like homemade yeast-risen bread doughs and handmade tortillas are totally within the home-cook's reach to master. Oh and that cara cara oranges are my favorite orange of them all. Anyone else think they look and taste like sweet pink lemonade?
What have you been dying to try in the kitchen but haven't gotten up the courage to do? Tell me what leaps you're thinking of taking (in the comments below)!
.
Super Citrus Salad
Ingredients
SALAD INGREDIENTS
- 6 cups of fresh baby greens*
- 1 navel orange
- 1 cara cara orange
- 1 blood orange
- ¼ c goat cheese**
- ½ c candied walnuts chopped
- 10 leaves of fresh mint
- ½ c dried cranberries
ORANGE VINAIGRETTE
- 2 tbs extra virgin olive oil
- juice of ½ orange about 3 tbs
- 1 tbs dijon mustard
- 1 tbs honey
- 1 tbs golden balsamic vinegar
- zest of ½ orange
- ¼ teaspoon salt
- freshly cracked black pepper
Instructions
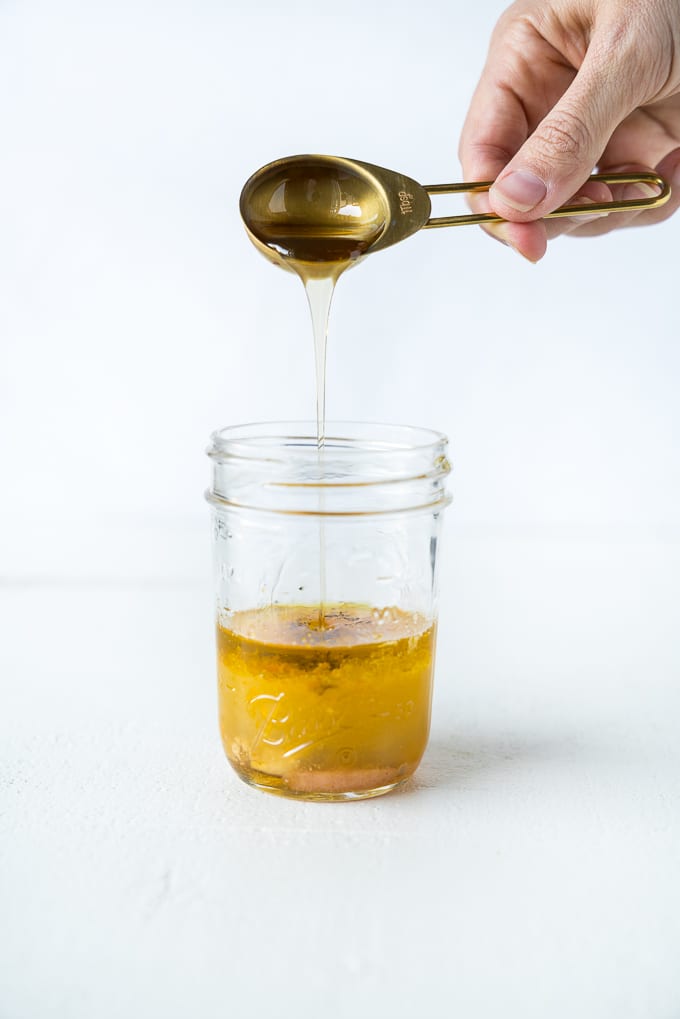
- SHAKE UP DRESSING: Add all dressing ingredients to a lidded jar and shake until well combined (or whisk together in a bowl).
- PREP THE ORANGES: Peel the oranges (either by hand or by slicing off the skin using the technique described in the post above // shown in the blog photos) and then slice into thin rounds. You can cut them into halves or quarters to make them into more bite-sized friendly pieces or just mix in some full rounds, halves, and quarters for fun presentation.
- ASSEMBLE THE SALAD: Divide the greens and oranges into two large bowls. Tear the mint leaves into pieces and sprinkle on top. Add the rest of the toppings (the candied nuts, goat cheese, and cranberries). Toss together with your desired amount of dressing. Serve and eat immediately.





Leave a comment, question, or rate this recipe